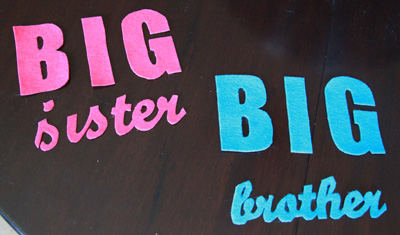
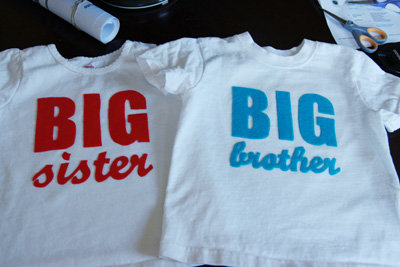
In celebration of Lola’s big gender reveal anniversary, I’m sharing the templates for and instructions for making the twins’ DIY big brother and big sister t-shirts. A huge thank you and shout out to Grace over at Finley and Oliver for the original inspiration and guidance, last year, when I took this project on.
What you’ll need:
- A pre-washed, blank t-shirt, one piece, or tank (Walmart is a great source for $3 t-shirts that don’t have pockets)
- Felt or fabric piece for the applique (I got mine at Michaels)
- Embroidery floss and needle (also at Michaels)
- Scissors (the small ones with a pointy tip work best)
- Heat n’ Bond fusible webbing (also at Michaels)
- Template for the applique (download big brother and/or big sister templates here, you may need to adjust the size of your template as these were made for 24M sized shirts)
I didn’t photograph all of my steps when I made these shirts originally, so I apologize in advance for the detailed description sans photos. If you run into issues or have questions, feel free to email me or leave them in the comments and I’ll try to talk you through it!
Instructions:
First take the template and place it under a sheet of your fusible webbing. Trace the “big brother” or “big sister” on to the webbing. You’ll want to make any thin lines a little thicker so they will be easier to cut and stitch later on. I left the templates printing in reverse, this is how you want to trace them so that when you flip them over and adhere them to your garment they read correctly!
Then iron your webbing onto your felt or fabric. Set your iron to the wool setting and make sure your steam is turned OFF. Iron the design onto your felt or fabric, holding the iron against the heat n’ bond and felt for about three seconds. Do not over iron.
Carefully cut the appliques out. This applique is a bit detailed, which is why having small, pointy tipped scissors is helpful. And why tracing the thin connecting lines a bit thicker is also helpful.
Next, peel away the paper that is still on your letters exposing your fusible webbing. Place your appliques where you want them on the t-shirt with the fusible webbing/glossy side down. Iron the applique to the garment by applying light pressure over the felt for about 10 seconds, again using the wool setting with no steam. Be super careful not to over iron, especially if you are using felt. I used felt from Michael’s when I made the kids’ shirts and I melted the felt and had to start over again. The shirts were salvageable, but the process was annoying.
Now that your letters are attached to your garment, you’re ready to start the applique process. For this process you will stitch by hand using a straight stitch, which is a really simple stitch to master. If you aren’t sure how to straight stitch a quick youtube search will solve that problem for you. Cut about 3-4 feet of your embroidery thread. Each skein of thread has six strands, separate two of the strands from the piece you’ve cut and thread them through your needle.
I used contrasting threads to make the applique pop, but if you’re nervous about sewing or just starting out, using coordinating threads will be more forgiving. Once you have finished stitching all of the appliques, you’re done. Voila!
Be sure to wash your garments inside out, to help the felt wash and wear better.


